|
Chi-Tech
|
|
Chi-Tech
|
Modules | |
| chi_mesh.ExtrusionLayer | |
| chi_mesh.FromFileMeshGenerator | |
| chi_mesh.MeshGenerator | |
| chi_mesh.OrthogonalMeshGenerator | |
| chi_mesh.SplitFileMeshGenerator | |
We split a MeshGenerator's execution into a phase that generates an unpartitioned mesh and a phase that then converts this mesh into partitioned chi_mesh::MeshContinuum (with both steps customizable). The phase that creates the MeshContinuum object can be hooked up to a partitioner that can also be designed to be pluggable.
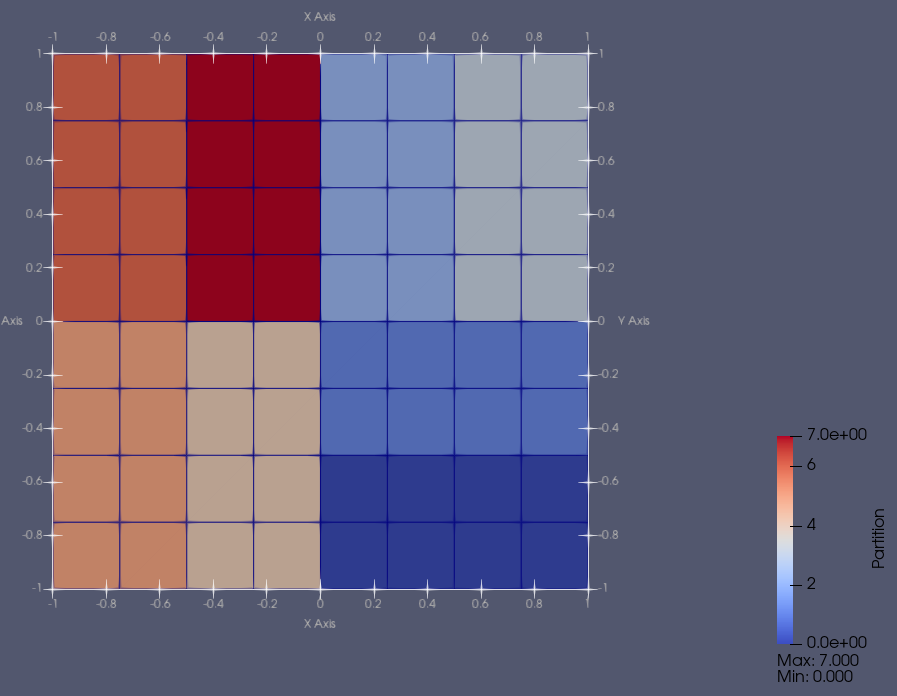
In this example we created a set of nodes (monotonically increasing in value) for use with the chi_mesh.OrthogonalMeshGenerator. We supplied the same set twice meaning the generator will build a 2D mesh.
We did not specify a partitioner and therefore the generator will use the chi.PETScGraphPartitioner with type="parmetis" by default. Using 8 processes, we can see the mesh and it's partitioning below.
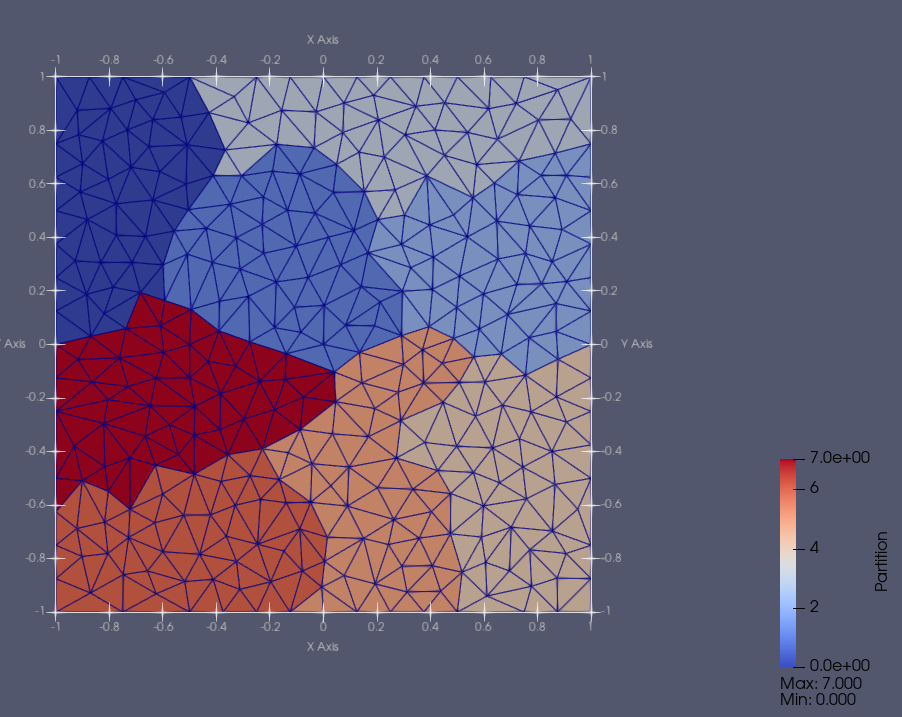
In this example we created a mesh by reading it from a file, using the chi_mesh.FromFileMeshGenerator. The types of file-types we can support is ever growing. At the time of writing this we support the following formats:
.obj Wavefront.msh gmesh,.e ExodusII,.vtu VTK Unstructured grid,.pvtu Pieced VTK Unstructured grid,.case Ensight GoldUsing 8 processes, we can see the mesh and it's partitioning below.
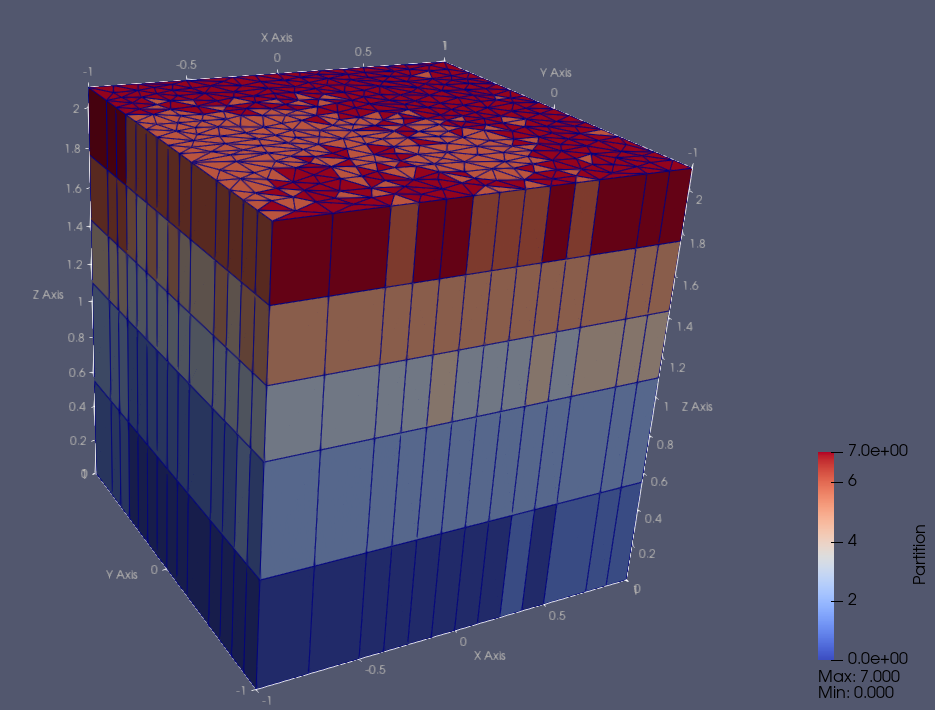
In this example we use an chi_mesh.ExtruderMeshGenerator with another mesh generator as an input to create an extruded mesh. Using 8 processes, we can see the mesh and it's partitioning below.

ChiTech now has a set of Graph Partitioners (i.e. based off GraphPartitioner) that support different forms of partitioning, for example we have:
"parmetis").An example of changing the partitioning to PETSc's "average" option is shown below:
Another example using the KBAGraphPartitioner is shown below
For very large meshes the mesh generation process could both take very long and require a lot of memory. The current mode of operation of the mesh generators is that each process builds the mesh as an unpartitioned mesh then the mesh gets converted to a partitioned mesh. Therefore, when a lot of processes are used, there could be a large memory spike, large enough to be greater than what even an HPC node has available. To partly address this problem we have the chi_mesh.SplitFileMeshGenerator. This generator will process multiple mesh inputs like any other mesh generator but instead of building the mesh on each processor only the home location builds the mesh. Thereafter the mesh is partitioned and each processors' local-cells, ghost-cells, and relevant vertices are written to separate binary files. The default folder, into which these files are written, is named "SplitMesh" and the default file names for the meshes are "split_mesh_x.cmesh", where the x represents the processors rank. Both the folder name and file name prefixes (i.e. the "split_mesh" part) can be altered via input parameters.
It is also possible to generate split meshes in serial by supplying the num_parts parameter. Also, if a simulation uses the same mesh over and over then the parameter read_only can be used to suppress the mesh being created every single time.
The examples below will create, in the current working directory, the folder SplitMesh and within it split_mesh_0.cmesh, split_mesh_1.cmesh, etc.
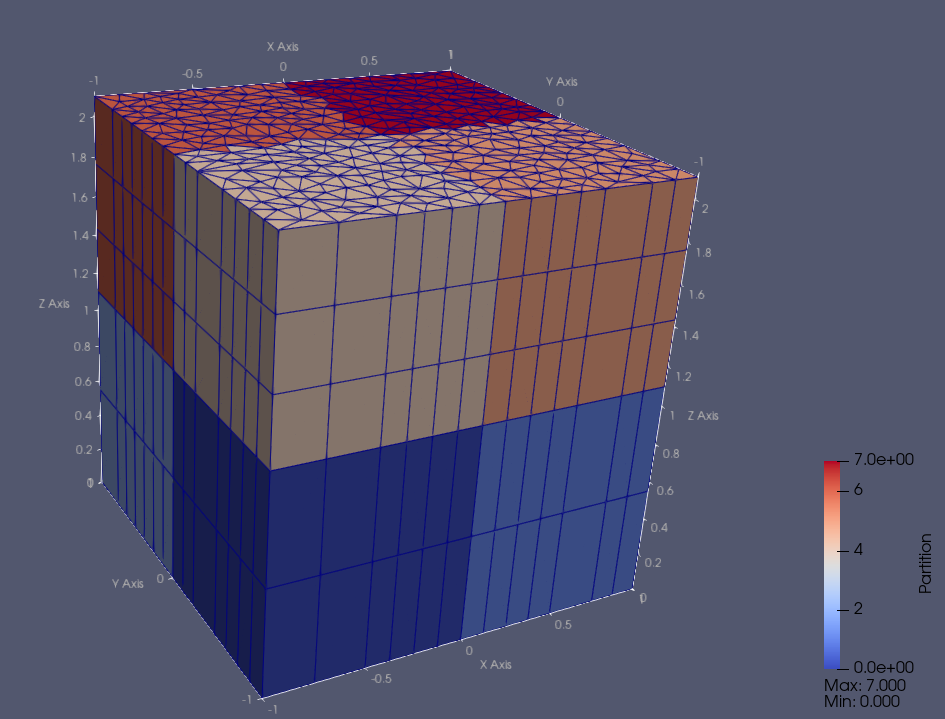
This example is the same as the one above it, however, it uses the extruder mesh generator in a chain.